










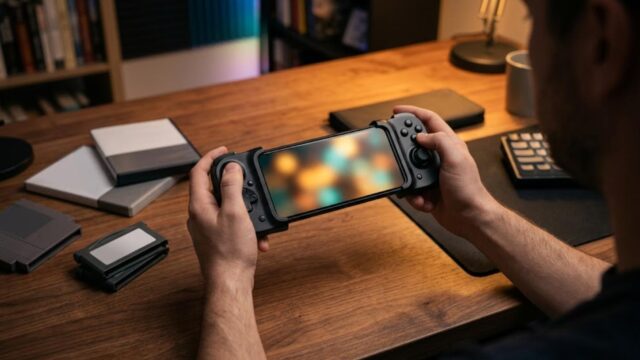

Short version: to play NES games on an Android phone or handheld, you only need one app, RetroArch. Pick the Mesen core if you want accuracy, or FCEUmm if your device is on the slower side. RetroArch will boot games with default settings, but the defaults leave you with noticeable input lag and occasional audio crackle, and those two issues are what most people actually complain about.
Any Android device sold today has more than enough power for NES emulation. Where people get stuck is configuration and input, not performance. So this guide spends less time on “which app” and more on “what to change after you install it”: copy-ready settings, controller setup, and fixes for the five most common problems. Expect 20 to 30 minutes from start to finish, even if you have never used RetroArch before.
One ground rule: this guide does not cover ROM download sites or where to get games. Everything here assumes you are playing data dumped from cartridges you own. The dumping side is covered near the end.
- The Quick Answer: NES on Android in Three Steps, by Device Tier
- Choosing an App: RetroArch vs. Standalone Apps, and Which NES Core
- Installation and Setup: Copy-Ready Settings in About 15 Minutes
- Connecting a Controller: Bluetooth vs. USB OTG
- Fixing Slowdown, Audio Crackle and Input Lag: 5 Common Problems
- Where the Games Come From: Dump Cartridges You Own
- Summary: Three Things to Do Today
The Quick Answer: NES on Android in Three Steps, by Device Tier
The whole process comes down to three steps: (1) install RetroArch, (2) download one NES core, (3) apply the recommended settings below. That gets you very close to the feel of original hardware.
Which core you should pick depends on your device’s chipset (SoC). The NES is a light system to emulate, but the cycle-accurate Mesen core does need a reasonable amount of CPU headroom. Find your device class in the table below.
| Device tier (SoC, roughly) | App | Core | What to expect |
|---|---|---|---|
| High-end: Snapdragon 8 series / Dimensity 9000 series | RetroArch | Mesen | Accuracy that is hard to tell apart from real hardware. Run-ahead at 2 frames with headroom to spare. |
| Mid-range: Snapdragon 6 and 7 series / Dimensity 7000 to 8000 series | RetroArch | Mesen (Nestopia UE if it struggles) | Fine for everyday play. Run-ahead at 1 frame recommended. |
| Entry-level: Snapdragon 4 series / MediaTek Helio G series | RetroArch | FCEUmm or QuickNES | Holds full speed. Run-ahead off or 1 frame. |
| You don’t want to touch settings | A standalone NES app (e.g. Nostalgia.NES) | n/a | Install and play. Little room for fine-tuning. |
Performance varies between chip generations within the same series. If you are unsure, start with Mesen and drop to FCEUmm if you see slowdown. (Checked August 13, 2026.)
Choosing an App: RetroArch vs. Standalone Apps, and Which NES Core
For most people, RetroArch is the right answer. The only real reason to pick a standalone NES app is if you never want to open a settings menu.
Three reasons RetroArch wins here:
- One interface for everything. Swap the core and you can play SNES, Game Boy, Genesis and other systems with the same controls and menus.
- Run-ahead. RetroArch’s run-ahead latency reduction (explained below) is not available in typical standalone NES apps.
- Free, with no ads and no in-app purchases.
Best NES Core for RetroArch: Mesen vs. Nestopia UE vs. FCEUmm vs. QuickNES
| Core | Accuracy | CPU load | Best for |
|---|---|---|---|
| Mesen | Very high (cycle-accurate) | Moderately high | Players who want accurate audio and correct behavior in games with unusual mappers. First choice. |
| Nestopia UE | High | Medium | Devices where Mesen is too heavy. A stable, conservative pick. |
| FCEUmm | Medium to high | Low | Entry-level devices. Supports a very wide range of mappers. |
| QuickNES | Lower | Lowest | When you need the lightest possible option. More games will fail to run correctly. |
Accuracy and load are relative comparisons, checked on the RetroArch stable release as of August 13, 2026.
If you can’t decide, go with Mesen. It brings the accuracy of the well-known desktop Mesen emulator to Android, and the difference in audio reproduction is easy to hear.
Google Play Version or the APK from RetroArch.com?
RetroArch is distributed both on Google Play and on the official website (retroarch.com). For most people the Play Store version is fine: it updates automatically and tends to cause fewer permission headaches.
Know the trade-off, though. Because of Google Play policy, the Play Store builds do not download cores from libretro’s own servers. You pick from a curated core list delivered through Google Play instead (the Plus edition offers a larger list and requires Android 8.0 or later). The website APK keeps the full Core Downloader and tends to receive new cores and fixes sooner, but you update it manually and have to allow installs from unknown sources.
A sensible order: start with the Play Store version, and move to the website APK if you run into a missing core or want the latest builds. Either way, choose the 64-bit build. The 32-bit build exists for older devices and has a narrower selection of cores.
If You Go With a Standalone App
If choosing a core feels like one step too many, a dedicated NES app works too. Install it, point it at your game folder, and play. The catch is that you give up run-ahead and detailed audio tuning. If input lag starts to bother you later, there is no setting to fix it, and that is the one real weakness of this route.
Installation and Setup: Copy-Ready Settings in About 15 Minutes
Installing takes about five minutes and configuration about ten. Follow the steps in order.
Step 1: Install RetroArch and Download an NES Core
- Install RetroArch (64-bit) from Google Play or the official website.
- Open it and go to Main Menu > Load Core > Download a Core.
- Select Nintendo – NES / Famicom (Mesen) and download it. On an entry-level device, pick Nintendo – NES / Famicom (FCEUmm) instead.
- On Android 11 and later, grant RetroArch All files access when prompted (or under Android’s app permissions). Without it, RetroArch cannot see your game folder.
Step 2: Add Your Game Files and Launch
Copy your dumped .nes files somewhere easy to find, for example Internal storage/RetroArch/roms/nes/. Keep folder and file names to plain ASCII letters and numbers. Names with non-ASCII characters (accented letters, Japanese, Korean and so on) usually work, but on some setups they break thumbnail lookups.
If you keep a large library on a memory card, a decent-quality microSD card is worth it for reliable reads.
Then go to Load Content, browse to the file, and select it. That’s it: your game is running.
Step 3: Recommended RetroArch Settings for NES (Copy These)
With default settings you will still feel input delay and hear occasional crackling. Enter the values below as-is. Everything is under Settings.
| Menu | Setting | Value | Why |
|---|---|---|---|
| Video > Synchronization | Vertical Sync (VSync) | On | Prevents screen tearing |
| Video | Threaded Video | Off | Turning it on adds latency. Only enable it on devices that stutter. |
| Video > Scaling | Integer Scale | On | Keeps pixels sharp instead of blurry |
| Video > Scaling | Aspect Ratio | Core Provided | Keeps the NES’s intended proportions |
| Audio > Output | Audio Latency (ms) | 64 (96 if audio crackles) | Tighter than the default, reducing audio delay |
| Drivers | Audio | audiotrack | Behaves consistently across devices. Only switch if crackling persists. |
| Latency | Run-Ahead | On, 1 to 2 frames | Clearly reduces perceived input lag. The single most important setting. |
| Latency | Second Instance | On | Makes run-ahead more stable |
| Saving | SaveRAM Autosave Interval | 10 seconds | Your in-game save survives if the app crashes |
| Saving | Auto Save State / Auto Load State | Both On | Quit and resume instantly |
Checked on the RetroArch stable release as of August 2026. Menu names and locations shift slightly between versions. In current builds, run-ahead is a single Run-Ahead mode selector under Settings > Latency: choose Second Instance Mode and set the number of frames to 1 or 2. Older builds show this as a run-ahead on/off toggle plus a separate Use Second Instance toggle. If some options are hidden, turn on Settings > User Interface > Show Advanced Settings.
Of all these, run-ahead makes the biggest difference. Even one frame changes how platformers and shoot-’em-ups feel. If the game slows down, drop it to 1 frame.
Connecting a Controller: Bluetooth vs. USB OTG
For relaxed play on the couch, Bluetooth is fine. If you want to shave off every last millisecond, go wired over USB OTG. Many NES games have tight timing windows, so the difference shows up more than you might expect.
| Connection | Latency | Convenience | Best for |
|---|---|---|---|
| Bluetooth | Slightly higher (a few ms to around 10+ ms) | High | Playing on the couch or in bed. Run-ahead can offset the difference. |
| USB OTG (wired) | Lowest | Needs a USB-C OTG adapter | Serious runs of action games and shmups |
| Phone-mounted grip controller | Lowest when wired | High | Handheld-style play, commuting and travel |
Once connected, check the button mapping under Settings > Input > Port 1 Controls. If RetroArch auto-detects your controller, it just works. If not, use Set All Controls on the same screen to bind each button one at a time.
For NES Games, D-Pad Quality Matters Most
NES games rarely use diagonal input. That makes a controller with a good, well-separated D-pad more comfortable than one built around analog sticks. In an action game, an accidental diagonal is often all it takes to miss a jump.
When choosing a pad, look at two things: (1) whether the D-pad lets you cleanly separate each direction, and (2) whether it supports a low-latency connection. Rumble and gyro go completely unused on the NES, so there is no need to pay for an expensive feature-packed model.
Can You Play With Touch Controls?
Yes. RetroArch includes an on-screen overlay gamepad, so you can play right away without a controller. But NES D-pad play and touchscreens don’t mix well, and games that need precise input rarely respond the way you want. Treat touch controls as a way to try things out; if you stick with it, getting a controller is the shortcut.
Fixing Slowdown, Audio Crackle and Input Lag: 5 Common Problems
If NES games are slowing down on your device, the cause is almost always settings or power saving, not raw performance. Here is what to do for each symptom.
1. Audio Crackles or Pops
Raise Audio Latency from 64 ms to 96 ms. If that doesn’t fix it, switch the audio driver from audiotrack to aaudio (or the other way around). This is where device-specific differences show up most.
2. Slow Motion or Stuttering
Exclude RetroArch from Android’s battery optimization. On most phones this is Settings > Apps > RetroArch > Battery > Unrestricted (wording varies by manufacturer). When power saving kicks in, the CPU doesn’t clock up and even a light system like the NES can drop frames. If it still stutters, switch the core from Mesen to FCEUmm.
3. Buttons Feel Delayed
Turn on run-ahead at 1 to 2 frames, and turn Threaded Video off. Those two changes solve most cases. If you are on a Bluetooth controller, switching to a wired connection cuts latency further.
4. Blurry or Smeared Pixels
Turn on Integer Scale and set Aspect Ratio to Core Provided. If it still looks soft, turn off Bilinear Filtering under Settings > Video.
5. Games Don’t Show Up in the File List
The most common cause is a missing All files access permission. The next most common is a wrong file format, such as a .zip nested inside another .zip. Use a plain .nes file, or a single, properly made .zip containing the .nes file directly.
Bonus: Habits That Keep Your Saves Safe
Android can kill apps that sit in the background for a long time. Setting SaveRAM Autosave Interval to 10 seconds is the most effective protection. On top of that, copy the RetroArch/saves/ folder in internal storage to cloud storage or another folder from time to time.
This matters most when you factory-reset or switch phones: forget this folder and dozens of hours of progress are gone. Back up your config file (retroarch.cfg) at the same time and your new device will feel exactly like the old one within minutes.
Where the Games Come From: Dump Cartridges You Own
The only games covered here are ones you dump yourself from cartridges you legally own. This blog does not link to or discuss ROM download sites. That is not a technical point; it is the baseline for doing this hobby responsibly.
A note on the law in the US: making a personal backup of a game you own sits in a legal gray area. Copyright law (including the DMCA) does not give a clear-cut personal-backup right for games, and downloading ROMs of games you don’t own is copyright infringement. Rules differ in the UK, Australia and elsewhere. This section is general information, not legal advice; if it matters to you, check the law where you live.
To dump NES cartridges you need a dedicated cartridge dumper, a device you plug the cartridge into and connect to a PC over USB, which reads the game data into a file. Options range from open-source cartridge reader projects to commercial USB dumpers, and the best choice depends on which systems and cartridge types you want to cover. You may also see the Retro Freak mentioned in Japanese guides; it is a Japan-only console that can back up cartridges, so outside Japan it is an import purchase. Once you have the .nes file on your PC, just copy it to your Android device and follow Step 2 above.
Summary: Three Things to Do Today
- Install RetroArch and download the Mesen core (or FCEUmm if you need something lighter).
- Set run-ahead to 1 to 2 frames, turn on Integer Scale, and set Audio Latency to 64 ms. Those three changes alone make a noticeable difference.
- Start with a Bluetooth controller, and switch to USB OTG if latency bothers you.
The NES is about the best-suited system there is for Android emulation. Performance is almost never the problem, so what separates a good experience from a mediocre one is whether you spend a few minutes on setup once. Copy the settings table above and you’ll be done in 20 minutes.


コメント