



8BitDo controllers give you a lot for the money, and the price of that flexibility is the mode system. The same pad can introduce itself to a machine as an Xbox controller, as a generic gamepad, as a Switch Pro controller, or as an Apple-compatible device. Choose the wrong one and you almost never get a clear error. The pad pairs but nothing moves. The sticks work and the face buttons do not. Windows sees the device, and the game you actually wanted to play does not.
This page is a lookup table first and an explanation second. Find your model, find the machine you want to connect to, and do exactly what the row says. The triage section below is for when the row does not work first time.
The tables cover the Pro 2, the SN30 Pro, the Ultimate Bluetooth and the Ultimate C 2.4G. If your pad is not one of those, do not assume the combos carry over: 8BitDo has changed startup behavior between generations. Look up your own model at support.8bitdo.com before you experiment.
- Three ways an 8BitDo pad switches modes
- Bluetooth pairing quick reference
- 2.4GHz receiver quick reference
- What the mode labels actually mean
- Windows and Steam: default to X-input, then check Steam Input
- When it will not pair: four checks, in this order
- Notes for each machine you might connect to
- Choosing your next pad by how it switches
- Before you start pressing combos
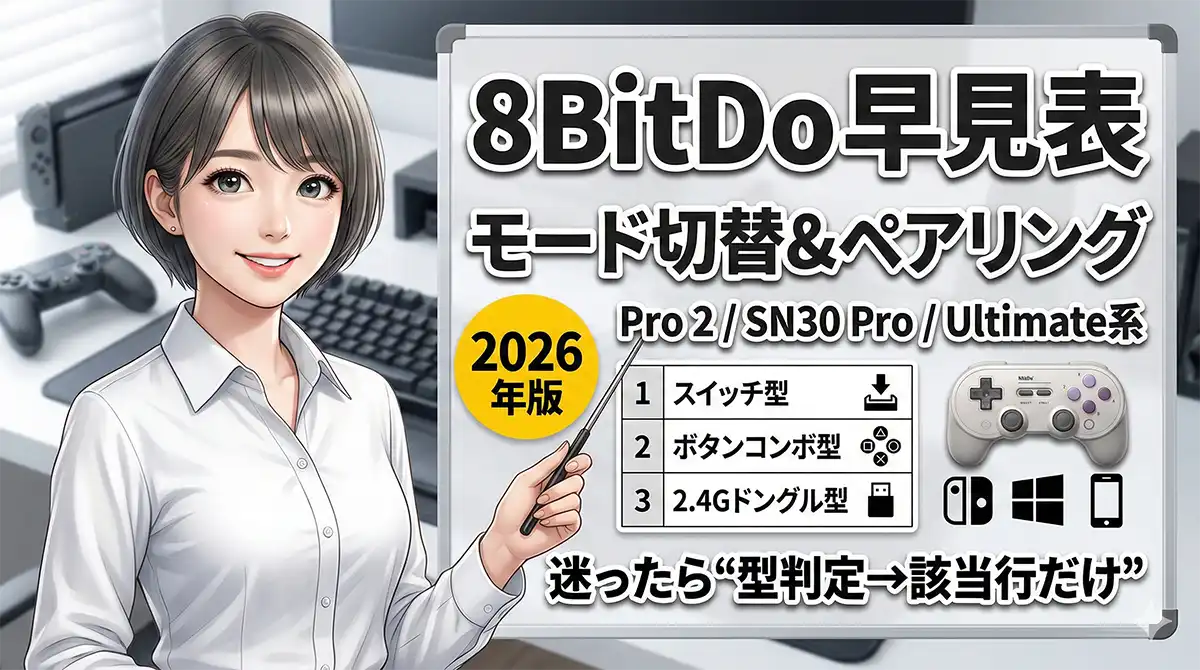
Three ways an 8BitDo pad switches modes
Before you memorize anything, turn the controller over. The back tells you which of the three systems you are dealing with, and that determines everything else on this page.
| What you see on the back | What it means |
|---|---|
| There is a physical slider switch | The switch position is the mode. Pro 2 uses S / A / D / X. The Ultimate series uses connection labels such as 2.4G and BT. |
| There is no physical switch | The mode is decided by a button combo held at power-on. The SN30 Pro is the classic example, with START + X and friends. |
| A 2.4GHz receiver came in the box | You are running over a USB dongle. Depending on the model you still have to choose X-input or D-input at startup, as the Ultimate C 2.4G does. |
Most “my 8BitDo stopped working” posts come down to a mismatch here. A slider-switch owner tries a button combo; a button-combo owner hunts for a switch that does not exist. Confirm which family you own and half the confusion disappears.
Bluetooth pairing quick reference
Use this table as the primary reference. The “power on” column is what puts the pad into the right mode; the pairing column is what makes it discoverable. Both steps are required, and they happen in that order.
| Model | Connecting to | Power on (mode) | Pairing action |
|---|---|---|---|
| Pro 2 (rear switch) | Nintendo Switch | Set the rear switch to S, then press START to power on | Hold the PAIR button for about 3 seconds, until the LED flashes rapidly |
| Pro 2 | Windows (X-input) | Set the rear switch to X, then press START | Hold PAIR for about 3 seconds |
| Pro 2 | Android (D-input) | Set the rear switch to D, then press START | Hold PAIR for about 3 seconds |
| Pro 2 | iPhone, iPad or Mac | Set the rear switch to A, then press START | Hold PAIR for about 3 seconds |
| SN30 Pro (button combo) | Nintendo Switch | START + Y | Hold the PAIR button for about 3 seconds |
| SN30 Pro | Windows (X-input) | START + X | Hold PAIR for about 3 seconds |
| SN30 Pro | Android (D-input) | START + B | Hold PAIR for about 3 seconds |
| SN30 Pro | Mac (macOS mode) | START + A | Hold PAIR for about 3 seconds |
| Ultimate Bluetooth | Any Bluetooth host | Move the rear mode switch to the BT label, then press HOME to power on | Hold PAIR for 3 seconds, until the status LED flashes rapidly |
Pro 2: the order is the whole trick
This is the single most common failure on the Pro 2, and it is worth stating on its own line.
First move the rear switch. Then press START to power on. Then hold PAIR for three seconds. If you power the pad on and move the switch afterwards, the new position is not applied.
People get caught because flicking the switch on a live controller does nothing visible. No beep, no LED change, no rejection. The pad keeps running in whatever mode it booted into while you blame the host device. If you are unsure what state it is in, power it off completely and start the sequence again.
A note on the Ultimate Bluetooth rear switch
Set the rear mode switch to the label matching how you are connecting: BT for Bluetooth, 2.4G for the dongle. The arrangement is not identical across models, so read the printed labels on your own unit and confirm against its FAQ at support.8bitdo.com rather than trusting a position order you saw elsewhere.
2.4GHz receiver quick reference
The dongle path is a different beast. There is no host-side pairing screen involved, so when it goes wrong there is nothing on screen to look at.
| Model | Connecting to | Power on and mode | Re-pairing |
|---|---|---|---|
| Ultimate Bluetooth | Windows (2.4G) | Move the rear mode switch to the 2.4G label, then press HOME to power on | Normally automatic. If the link is unstable, follow the official manual for your model. |
| Ultimate C 2.4G | Windows or Android | From a fully powered-off state, hold X + HOME for X-input, or B + HOME for D-input, while the pad starts up | With the receiver plugged in, hold the minus button for 5 seconds. When the HOME LED flashes rapidly, wait for the link to come back. |
Two details on the Ultimate C 2.4G. The official FAQ gives no hold duration for X + HOME or B + HOME, so treat those as “hold while it boots” rather than a timed press, and do not copy a number from a forum post. The 5 second hold on the minus button for re-pairing is documented.
If a dongle pad behaves erratically, check the receiver’s physical situation before touching any combo. A USB 3.0 port beside the receiver, a metal case wall, or a front-panel header can all degrade a 2.4GHz link. Moving the dongle onto a short extension cable is a cheap test that rules out a lot.
What the mode labels actually mean
| Label | What it is | When to reach for it |
|---|---|---|
| X-input | The convention most Windows games are built around | Your default on Windows. If you do not know which to pick, pick this. |
| D-input | An older method still used by some PC games and some environments | Use it as a diagnostic when X-input produces broken or scrambled behavior, and on Android. |
| S (Switch) | Presents the pad to a Switch as a Pro Controller | Only for the console itself. |
| A (Apple) | The mode aimed at iPhone, iPad and Mac, where the model offers it | Apple hardware first. Not every model has it. |
Windows and Steam: default to X-input, then check Steam Input
This is where English-speaking readers most often land, because so much of the PC audience plays through Steam or on a Steam Deck. The important thing to understand is that you now have two mode systems stacked on top of each other. The controller has a hardware mode, and Steam has its own controller layer that can re-present whatever is plugged in as something else entirely. When they disagree, the symptoms look like hardware faults but are not.
Symptoms that point at software, not at the pad
- Doubled inputs. One press of A moves two menu entries, or a single jump fires twice. That usually means the game is reading the physical device and a software-created virtual controller at once.
- Works in the Steam interface, dead in the game. Big Picture navigates perfectly, then the game ignores the pad entirely.
- Wrong button prompts. You get PlayStation or generic numbered prompts where you expected Xbox prompts, which tells you which mode the game thinks it is talking to.
- One game is fine, another is not. Per-game settings exist, so a problem that follows a single title is almost never the controller.
A safe order to test in
- Fix the hardware mode first. Power the pad down, put it into X-input using the row from the table above, and reconnect. Do not touch any software setting yet.
- Test outside Steam. Windows has a built-in gamepad properties panel, reachable by searching the Start menu for the game controller settings. If the buttons and sticks register there, the pad and the connection are fine and the remaining problem is software.
- Then open Steam’s controller settings. Steam exposes both a global controller configuration and per-game overrides, and the layout of these menus has been revised several times, so navigate the version you actually have rather than following an old screenshot. Look for the toggle governing whether Steam handles your controller type at all.
- Change one thing at a time. Toggle a single setting, relaunch the game, and write down what you changed. Flipping the hardware mode and a Steam setting together is how people end up with a configuration they cannot retrace.
Steam Deck
The same logic applies on a Deck, with one extra wrinkle: the machine already has built-in controls with their own configuration, so an external pad competes with hardware that is always present. Start the pad in X-input, confirm it appears in the Deck’s controller settings list, and only then assign layouts. Connecting in Switch mode is legitimate, but it changes which default layouts apply and which prompts you see. Pick one mode deliberately and stay in it while troubleshooting.
On a desktop PC, remember that a cheap or elderly built-in Bluetooth radio is itself a variable. Testing with a known-good USB adapter quickly separates a controller problem from a radio problem.
When it will not pair: four checks, in this order
Work through these from the top. Skipping ahead is how a five-minute fix becomes an evening.
- Is the startup mode right? Confirm the rear switch position, or the START combo, against the table above. This accounts for the majority of failures.
- Did the PAIR hold actually register? Watch the LED. A rapid flash means the pad is advertising and waiting. A slow or steady light means it is not, and no amount of searching on the host will find it.
- Is the host in pairing mode? A Switch needs to be sitting on the Change Grip/Order screen. Windows needs the Add device dialog open, reached through Settings, then Bluetooth and devices. The controller broadcasting into a host that is not listening produces exactly the same silence as a controller that is not broadcasting.
- Is something else grabbing it first? A phone or tablet on the same desk that previously paired with this controller will often reconnect the moment the pad powers on. Switch Bluetooth off on nearby devices temporarily and try again. This one is invisible and catches experienced people.
If you own a button-combo model and the mode simply will not change, the fix is almost always the same: enter the mode command from a fully powered-off state. Holding START + X on a controller that is already running frequently does nothing at all. Power it down, wait a moment, then hold the combo as it starts.
Notes for each machine you might connect to
Nintendo Switch
Put the console on the pairing screen first, the one you reach through the controllers menu to change grip and order, and only then sync the pad. “I pressed PAIR and nothing appeared” is nearly always a console that was never listening.
Windows
Start the pad in X-input, open Settings, go to Bluetooth and devices, add a device, hold PAIR, and pick the controller from the list. For the 2.4GHz route, plug the receiver in before powering the pad on in 2.4G mode.
Android
Try D-input first. Plenty of Android games and emulator front-ends map cleanly to it and produce sane defaults. If your app has its own key-mapping screen, remap there rather than switching the controller’s hardware mode back and forth.
iPhone, iPad and Mac
Try the Apple (A) mode first, on models that offer it. On a Mac, the SN30 Pro’s dedicated macOS combo is the equivalent starting point. If your model has no Apple mode, that is a hardware limitation and no combo will create one.
Choosing your next pad by how it switches
If you are buying rather than troubleshooting, the switching method matters more day to day than the spec sheet. Think in terms of the three families rather than specific part numbers, because the families behave consistently even as models come and go.
| Switching method | Best for | The trade-off |
|---|---|---|
| Rear physical switch | People who move one pad between several machines regularly | You can see the current mode at a glance, but you must remember to set it before powering on. |
| Startup button combo | People who mostly stay on one platform | Nothing to knock out of position, but the mode is invisible and you have to memorize the combos. |
| 2.4GHz dongle | Desktop PC use where connection stability matters most | You need a free USB port, you have a small receiver to lose, and it is not usable on hosts without USB. |
Before you start pressing combos
A caution that applies to every table here. Startup combos are model-specific, and the wrong combination can put your controller into a mode you did not intend, or change a setting with no visible confirmation. Nothing is destructive, but it wastes time and leaves you troubleshooting a problem you created.
Before trying anything from a page like this one, including this one, confirm the procedure for your exact model in the official manual or FAQ. 8BitDo publishes per-model documentation at support.8bitdo.com, and that is the authority wherever it disagrees with anything written here. Firmware updates can change behavior too, so if your pad was updated recently and something no longer matches, check the official documentation again before assuming the hardware has failed.
Take thirty seconds now to note down the one row that applies to your pad and your main machine. These combos are easy to look up and impossible to remember, and you will want them at the exact moment both hands are full.
コメント