


Snes9x Setup Guide for Windows 11 (2026): Install, Best Settings, Save States & Fixes
If you want the fastest, most “just works” SNES/Super Famicom emulator on Windows 11, Snes9x is still a top pick in 2026. It boots quickly, runs smoothly even on modest PCs, and has the modern comforts that real hardware never had: save states, fast-forward, filters, and more.
Important (legal + preservation): Emulators are generally legal software, but downloading ROMs from the internet is illegal in many regions. This guide is written for people who want to play ROM files dumped from cartridges they personally own for backup/preservation.
Need a safe, practical dumping method? Start here:
👉 How to Dump Retro Games to PC using Retro Freak (English)
And if you want a clear “OK/NG” line for personal use:
- TL;DR (Fastest Setup)
- Before You Start (What You Need)
- Step-by-Step: Install Snes9x on Windows 11
- Optional: Add a Japanese UI (Menu Translation)
- Controller Setup (Best Settings, One Trap to Avoid)
- Make It Look Right: 2 Video Settings That Matter
- Save Files + Save States (And How to Back Them Up)
- Troubleshooting (Common Problems + Fixes)
- FAQ
- Recommended Gear (Comfort + Preservation)
- Summary
TL;DR (Fastest Setup)
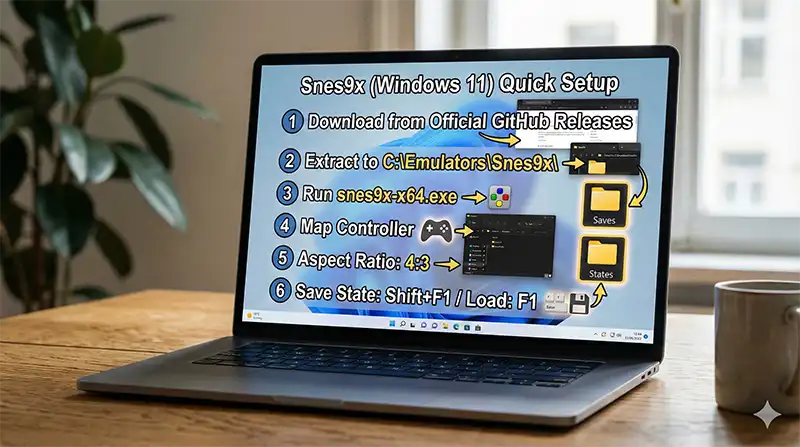
- Download Snes9x from the official release page (Windows 11 = 64-bit build):
👉 Snes9x GitHub Releases (official) - Extract the ZIP to a simple folder like
C:\Emulators\Snes9x\(avoidProgram Files). - Launch
snes9x-x64.exe(or similar) → File → Load Game to open your dumped ROM. - Set a controller: Input → Input Configuration → map buttons (leave diagonal inputs Disabled).
- Fix stretched fullscreen: Video → Display Configuration → Aspect Ratio = 4:3.
- Use save states: Shift+F1 (save) / F1 (load). Back up
SavesandStatesfolders.
Before You Start (What You Need)
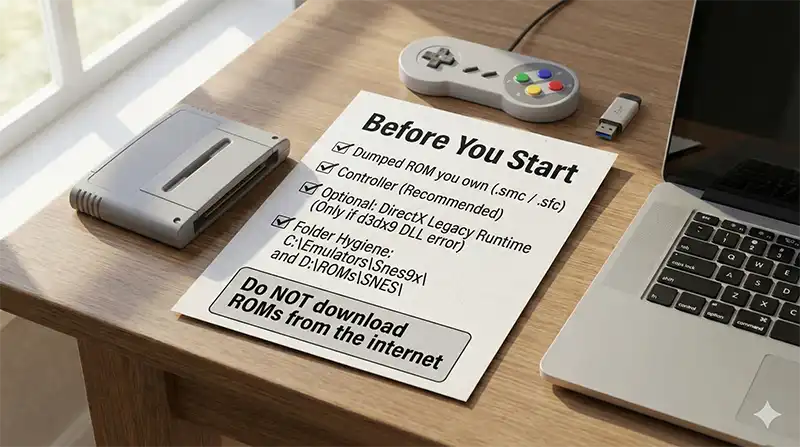
- A dumped SNES/SFC ROM from a cartridge you own (common extensions:
.smc,.sfc,.fig,.swc). - A controller (recommended) or keyboard.
- Optional: DirectX legacy runtime (only if you hit a
d3dx9_XX.dllerror on launch).
Pro tip (folder hygiene): Emulators behave best when they’re “portable” in a clean folder you control. Create something like:
C:\Emulators\Snes9x\D:\ROMs\SNES\(your own dumps)D:\ROMs\SNES\_SavesBackup\
Step-by-Step: Install Snes9x on Windows 11
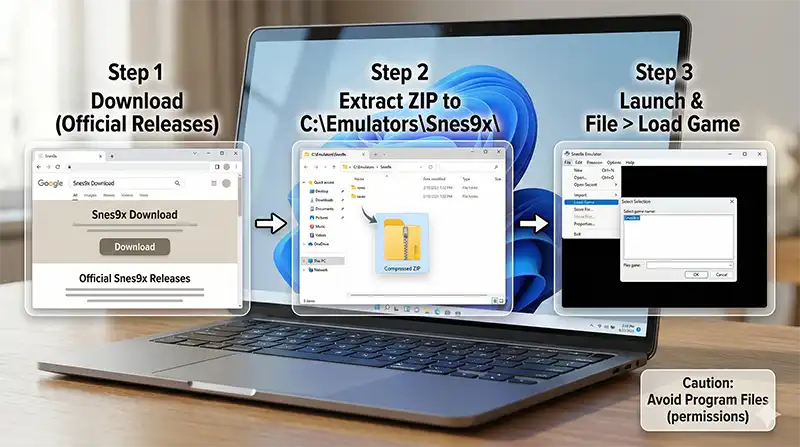
Step 1) Download Snes9x (Safe Source)
Use the official release page and download the latest Windows build (64-bit for Windows 11):
👉 Snes9x GitHub Releases (official)
Step 2) Extract the ZIP (Don’t Install to Program Files)
Extract the ZIP to a simple folder you own, for example:
C:\Emulators\Snes9x\
Why? Windows permissions in Program Files can block save files and configs, causing weird issues later.
Step 3) First Launch + Load a Game
Run the Snes9x executable, then:
- File → Load Game
- Select your dumped ROM file (
.smc/.sfcetc.)
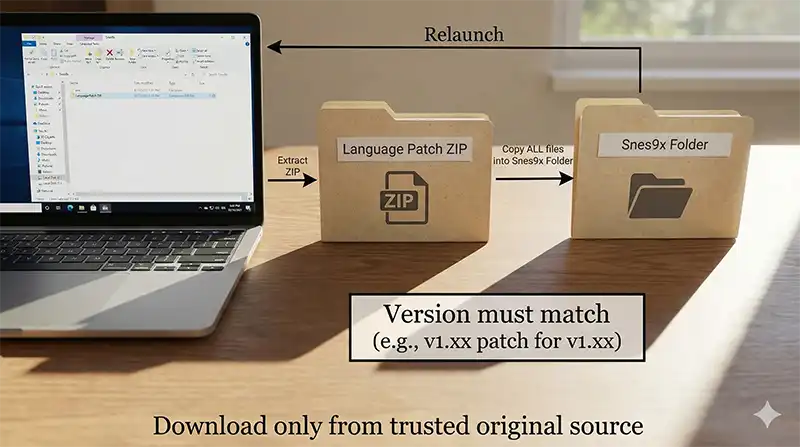
Optional: Add a Japanese UI (Menu Translation)
Most English speakers don’t need this, but it’s useful if you’re following Japanese guides/videos or you simply prefer Japanese menus.
- Look for a community “Japanese language patch” that matches your Snes9x version (example: v1.63 patch for v1.63).
- The patch is typically distributed as a ZIP containing a few files.
How to apply (portable-style):
- Extract the patch ZIP.
- Copy all files from the extracted patch into your Snes9x folder (the same folder as
snes9x.exe). - Launch Snes9x again and confirm the UI language changed.
Security note: Language patches are often hosted on older personal sites. Only download from the original author/source you trust, and keep everything version-matched.
Controller Setup (Best Settings, One Trap to Avoid)
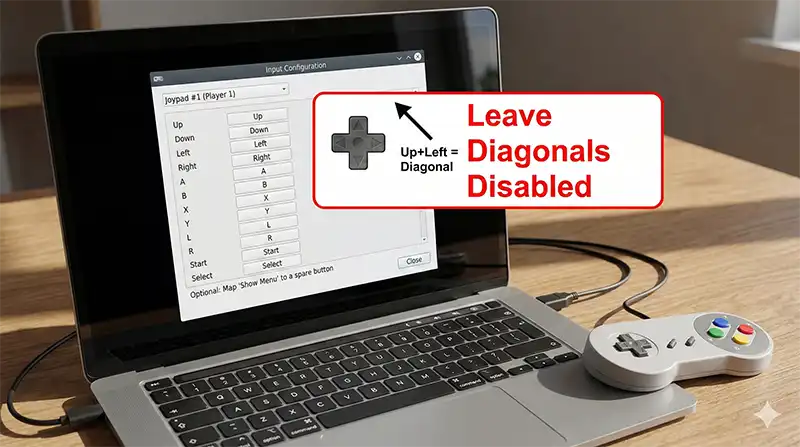
Open the input settings
Connect your controller to the PC first, then open:
Input → Input Configuration
Map buttons (Joypad #1 = Player 1)
- Confirm Joypad #1 is selected.
- Click a box like Up, then press the controller’s D-pad Up.
- Repeat for Down/Left/Right, then A/B/X/Y/L/R/Start/Select.
Pro tip: Leave diagonal directions Disabled
You may see diagonal inputs like “Up-Left” or “Down-Right”. Keep these as Disabled.
Why? If you map diagonals manually, games that rely on smooth rolling inputs (example: quarter-circle moves in fighting games) can become inconsistent. Snes9x automatically detects diagonals when Up/Down/Left/Right are pressed together—no manual diagonal mapping needed.
Optional comfort: Map “Show Menu” to a spare button
In the input window, click Shortcuts and find something like Show Menu. Map it to a spare button (e.g., the PlayStation “PS” button).
This lets you open save/load menus instantly without touching the mouse—huge quality-of-life upgrade.
Make It Look Right: 2 Video Settings That Matter
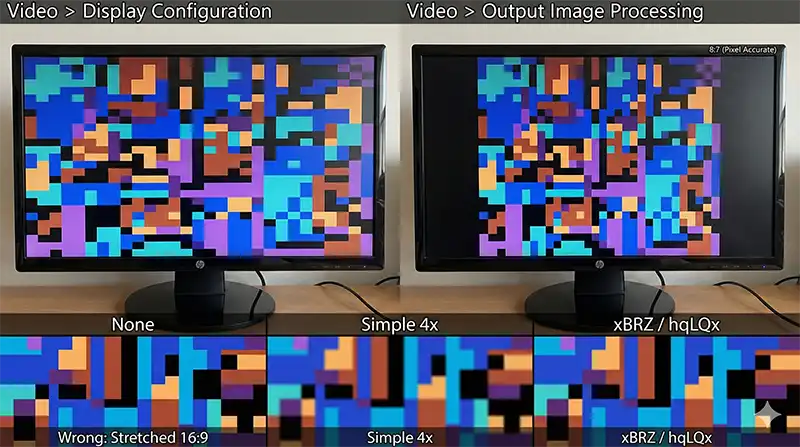
1) Fix the aspect ratio (stop the “wide Mario” problem)
Modern monitors are 16:9, but SNES was designed for 4:3. To prevent stretched fullscreen:
- Video → Display Configuration
- Aspect Ratio: choose 4:3 (recommended) or 8:7 (pixel-accurate feel)
Which should you choose?
- 4:3: closest to how it looked on CRT TVs back then (my default recommendation).
- 8:7: closer to “square pixel” art math; can feel slightly taller.
2) Try a filter (sharp pixels or smoother edges)
Open:
- Video → Output Image Processing
Good starting points:
- Simple 3x / 4x: keeps corners sharp; crisp and clean.
- hqLQx / xBRZ: smooths pixel edges; often makes RPG text easier to read.
- None or Scanlines: if you want a more “retro display” vibe.
Save Files + Save States (And How to Back Them Up)
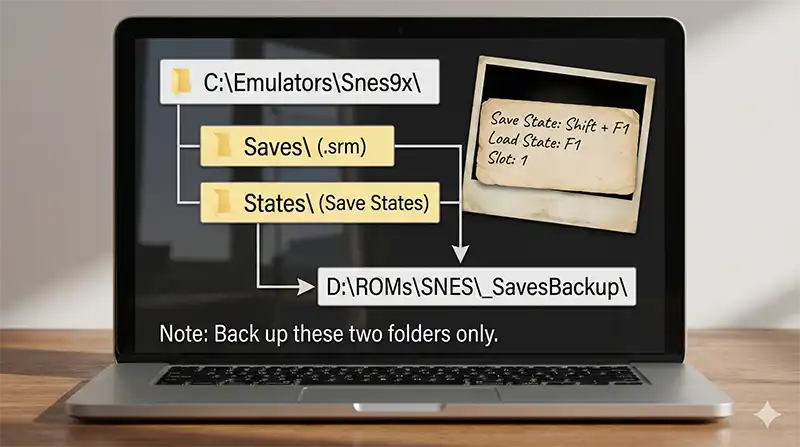
Two save systems (use both)
1) Normal in-game saves (battery save)
This is the “real” save system inside the game. Snes9x stores these as .srm files in a folder like:
Saves\
2) Save states (“save anywhere”)
Save states freeze the entire game instantly—even mid-battle or mid-dialogue.
Default shortcuts (common setup):
- Shift + F1: save state to Slot 1
- F1: load state from Slot 1
Back up the only two folders that matter
Inside your Snes9x folder, back up:
- Saves (normal saves)
- States (save states)
Copy them to a USB drive or cloud storage occasionally. If you ever move to a new PC, restoring these folders brings your progress back instantly.
Troubleshooting (Common Problems + Fixes)
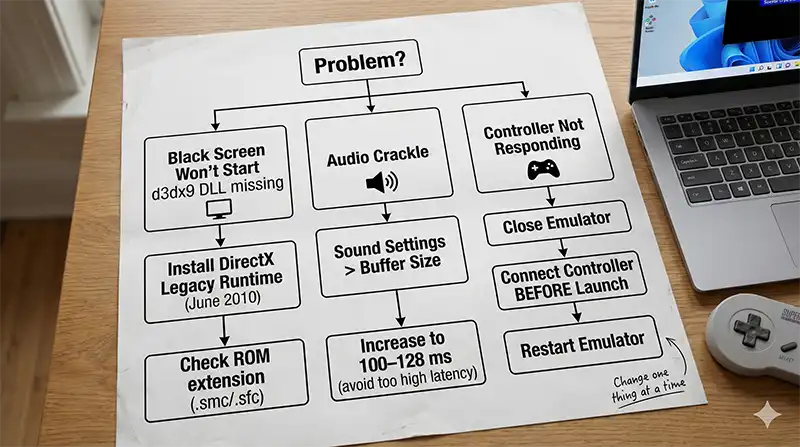
Q1) Black screen / game won’t start / d3dx9_XX.dll missing
Cause: Missing legacy DirectX runtime, or the ROM file format/extension is wrong.
Fix:
- Install Microsoft’s legacy DirectX runtime (official):
👉 DirectX End-User Runtimes (June 2010) - Confirm your ROM file extension is a known SNES/SFC format (
.smc,.sfc, etc.).
Q2) Audio crackles (“buzzing” / stuttering sound)
Cause: Audio buffer too small for your system load.
Fix:
- Open Sound → Settings
- Find Buffer Size
- Increase it (example: from 64ms → 100–128ms)
Tip: Too high = noticeable input/audio delay. Increase only until crackle stops.
Q3) Controller doesn’t respond at all
Cause: Snes9x may not detect controllers connected after launch.
Fix (order matters):
- Close Snes9x completely
- Connect the controller (USB or pair it)
- Confirm Windows detects it
- Launch Snes9x again
If you want a deeper “why it happens” breakdown (Japanese article):
👉 Snes9x controller not responding: causes & fixes (JP)
FAQ
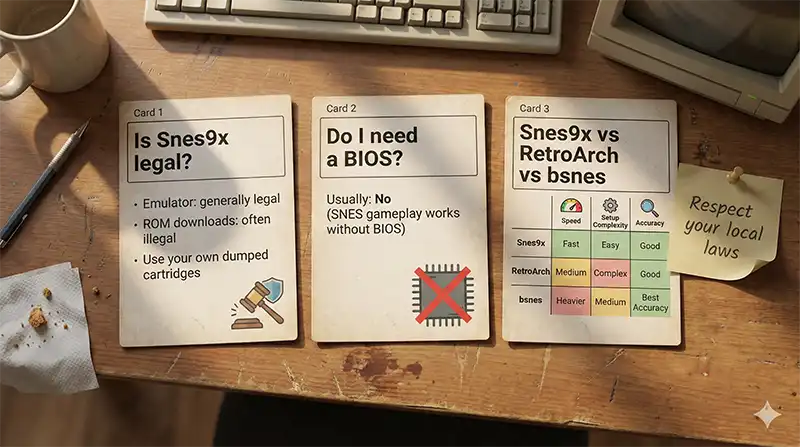
Is Snes9x legal?
In general, the emulator software itself is legal. The legal risk comes from ROM distribution/downloading. Use ROMs dumped from cartridges you personally own, and don’t share them.
Clear “OK/NG” checklist here:
👉 ROM Dumping Legality Guide (OK/NG in 7 checks)
Do I need a BIOS for SNES emulation?
Typically no—Snes9x runs without a BIOS for normal gameplay.
Which is better: Snes9x, RetroArch, or bsnes?
- Snes9x: lightweight, fast boot, great daily-driver feel.
- RetroArch: unified frontend, tons of features, more setup complexity.
- bsnes: accuracy-focused, can be heavier depending on settings.
If you want an NES/Famicom “modern best choice” guide too, here’s my English setup article:
👉 Mesen Emulator Setup Guide (2026) for Windows 11
Where are my save files stored?
Inside your Snes9x folder (portable setup):
Saves\for.srmnormal savesStates\for save states
Recommended Gear (Comfort + Preservation)
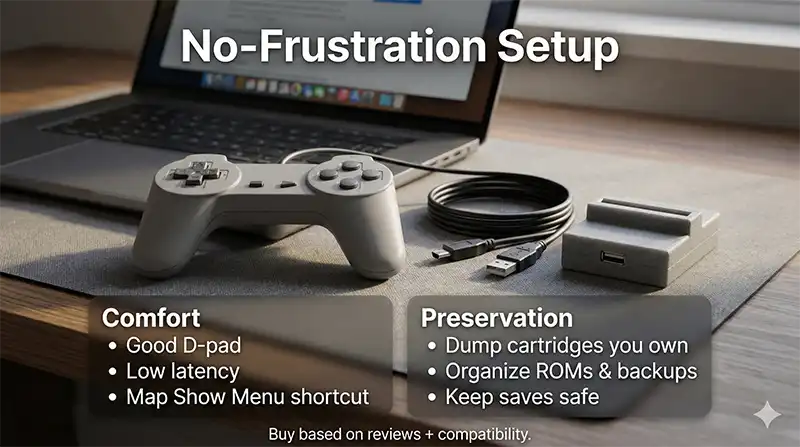
If you want a “no frustration” setup, these are the upgrades that actually matter.
1) A good controller (this is the biggest quality-of-life boost)
- 8BitDo Pro 2 (great D-pad feel + multi-mode)
- Logitech F310 (budget classic, reliable)
- GameSir G7 SE (high durability options)
Link (Amazon / OneLink):
👉 Check current prices & reviews (controllers)
If you want a “pick one” guide (Japanese):
👉 Best PC Gamepads (Logicool / 8BitDo / GameSir) (JP)
2) A legal dumping method (preservation-first)
If you want the easiest path that’s also clean and repeatable:
👉 How to Dump Retro Games to PC using Retro Freak (English)
Summary
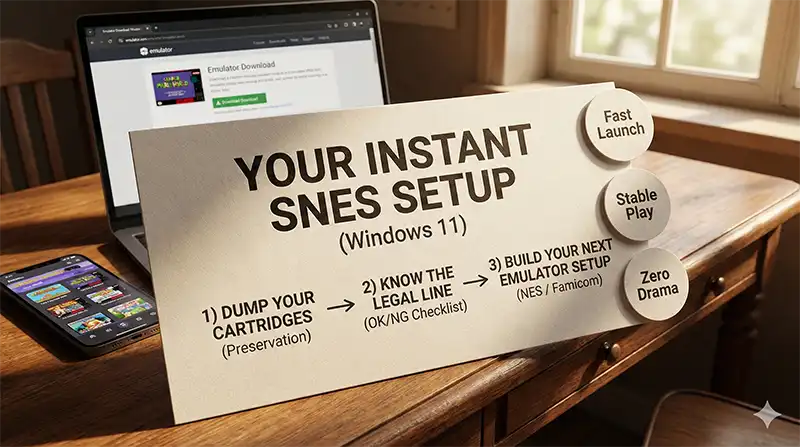
That’s it—your Windows 11 PC is now a “instant SNES” machine.
In 2026, many people chase feature-heavy setups, but Snes9x still wins at the thing that matters most: fast launches, stable play, and zero drama. Perfect for “15 minutes before bed” gaming.
Next steps (recommended):
- Dump your cartridges safely: Retro Freak dumping guide (EN)
- Understand legal boundaries:

コメント